Enabling Alibaba Cloud OSS as Media Library in WordPress
Introduction
One of the reasons for a website loading too slowly might be the slow loading of images.
Many websites choose to host their servers on overseas VPS to avoid ICP filing in China, but overseas hosts are often not very friendly to domestic users, resulting in slow connection speeds.
To improve this situation, we can migrate the WordPress media library to Alibaba Cloud OSS to use Alibaba Cloud's acceleration services.
Note: Alibaba Cloud OSS is a paid service. The domestic region currently costs 9 RMB/40GB/1 year, and traffic fees are charged separately. For details, please refer to the Alibaba Cloud OSS official website.
Preparation Tools
Alibaba Cloud account and Alibaba Cloud OSS Bucket, a set up WordPress system, Alibaba Cloud Accesskey
Download the aliyun-oss plugin, download link: Github (Developer: IvanChou)
You can also click Resource Sharing in the main navigation to download.
Alibaba Cloud OSS Configuration
Log in to the OSS management console, find your created Bucket. If not yet created, click Create Bucket in the upper right corner (set Read/Write permissions to Public Read, Standard Storage).
In the overview, you can see the access URL.
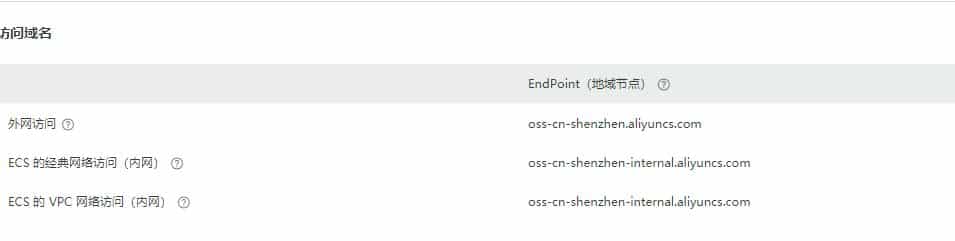
Access Domain
Click File Management above, and create a new directory /wp-content/uploads (for the convenience of subsequent settings)
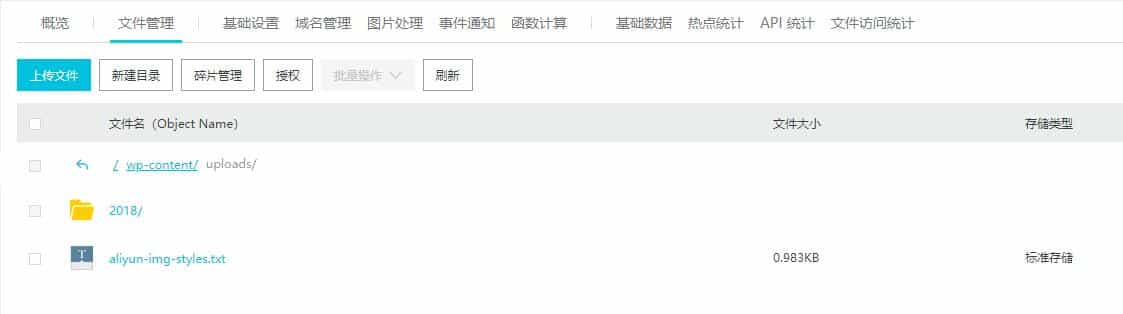
Storage Path
Select Basic Settings above, scroll to the bottom to set up Mirror Fetch.
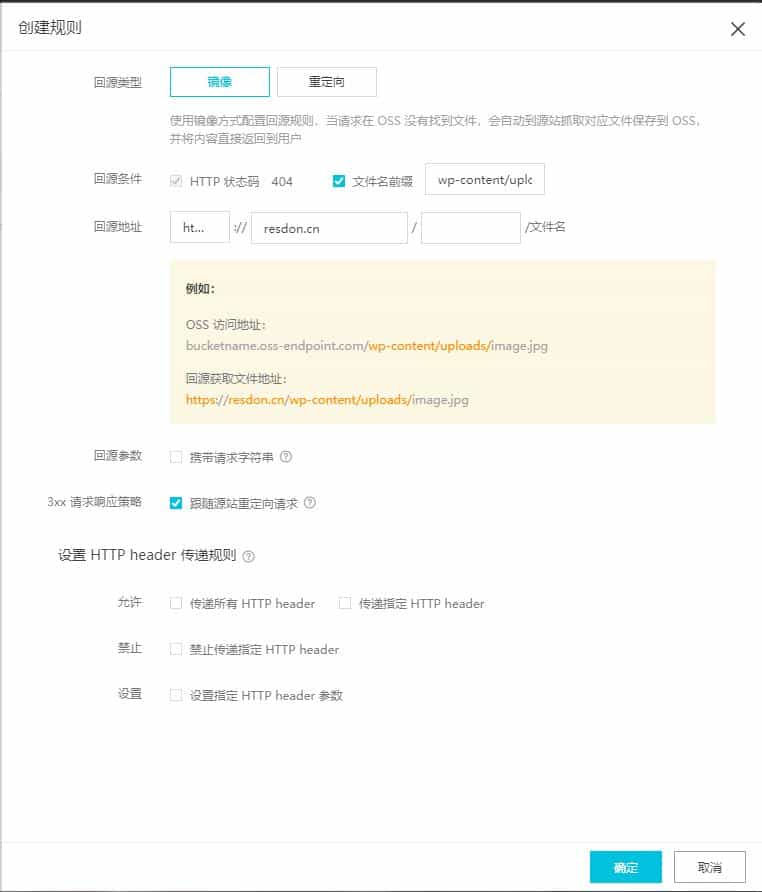
Mirror Fetch
The file name prefix is wp-content/uploads/, and the origin URL is http(s)://yourwebsite.
Next, you can proceed with the plugin configuration.
Install and Configure the Plugin
In the WordPress admin interface, select Plugins->Add New->Upload Plugin, find the downloaded plugin, and install and activate it.
Configure it in Settings->Alibaba Cloud OSS, as shown in the figure below.
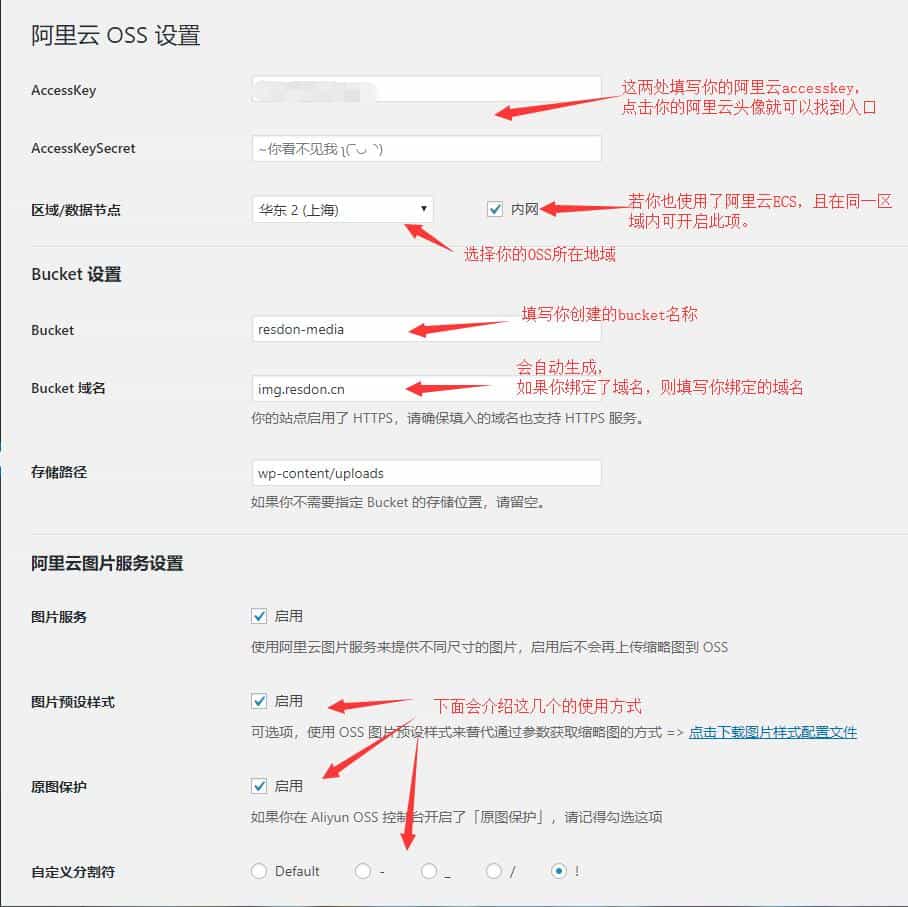
Create Rule
Once everything is set, click Save Configuration and you're done.
Additional Feature Settings
Image Preset Styles
Click Download Style Configuration File on the right, a new window will pop up with a txt file. It might not download automatically, so copy the URL into a download tool to download it.
Then return to the OSS Management Console, select Image Processing->Import Styles, and choose the downloaded txt file to import it.
If you want image watermarks, you can first upload the watermark file to the OSS storage space, then edit the full rule, and configure it according to the prompts in the figure below.
(Position, size, and transparency depend on personal preference. The watermark image path is the OSS file path, which can be found by clicking Preview in File Management)
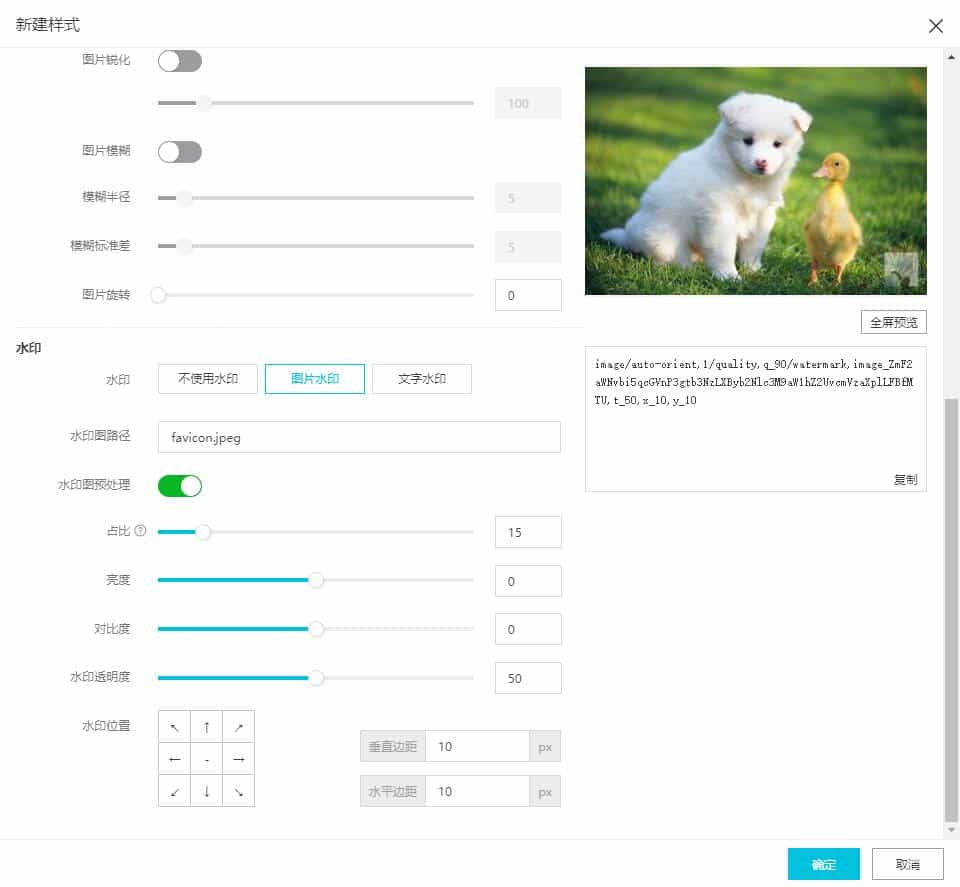
Image Style Settings
Original Image Protection
In Image Processing, click Access Settings to enable Original Image Protection, and configure it as shown below.
(It is not recommended to check this and it is strongly recommended to convert the site icon format to ico before uploading and setting it, otherwise the site icon will not be displayed!*The solution is discussed below**)
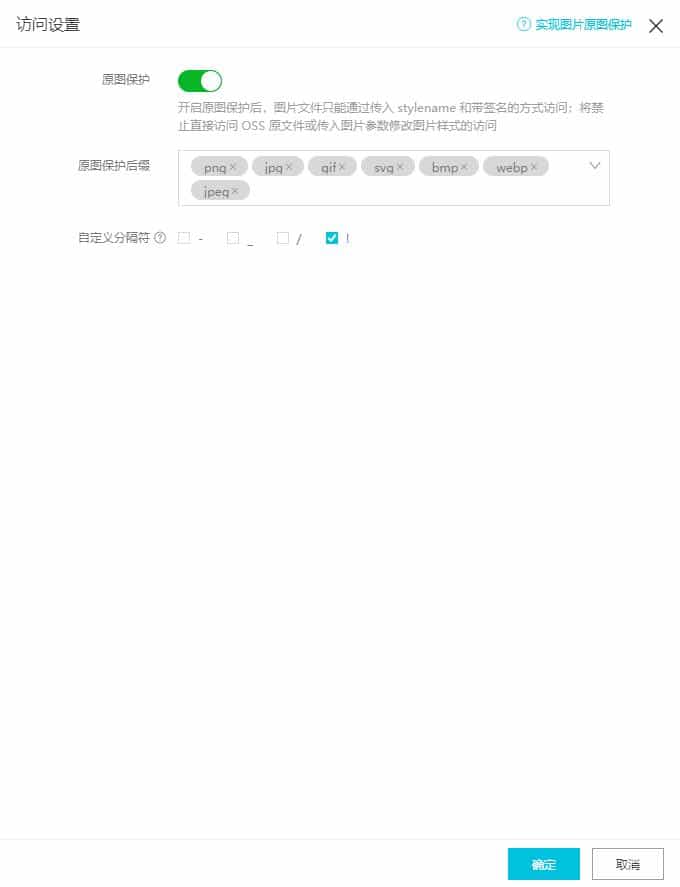
Original Image Protection
Advanced Options
Select More Options at the bottom of the plugin settings to open the advanced options.
The solution for the site icon failing to load due to enabling original image display is as follows:
Change the name of the site icon to be uploaded, for example, favicon,
then fill in the changed name in the Files to Exclude option, so that the image can load directly without going through OSS.
As shown in the figure below.

WordPress Settings
Note: This operation will cause all images with favicon to bypass OSS and load directly. It is recommended to choose an uncommon name.
Summary
The configuration work is now complete. If you have an ICP filing in mainland China, you can also enable CDN acceleration, which can be set in Domain Management.
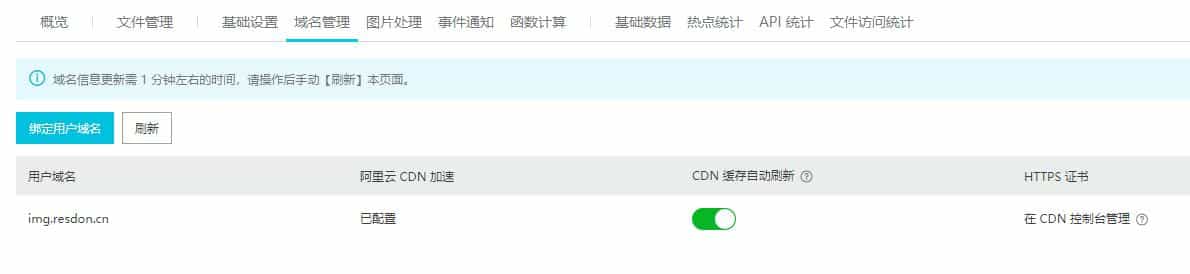
CDN Acceleration Settings